Tasks
Create a task, set its fields, track sub-tasks, write comments, and link one task to another.
Create a task
You need the Read/write role, and the board must be open.
- To create a task in an epic, select the add button in the left part of the epic lane.
- To create a task with no epic, select Task in the board header.
Enter a name. The new task starts in the Unstarted column.
The task drawer
Select a card to open the task drawer. The drawer shows the task at the right side of the page.
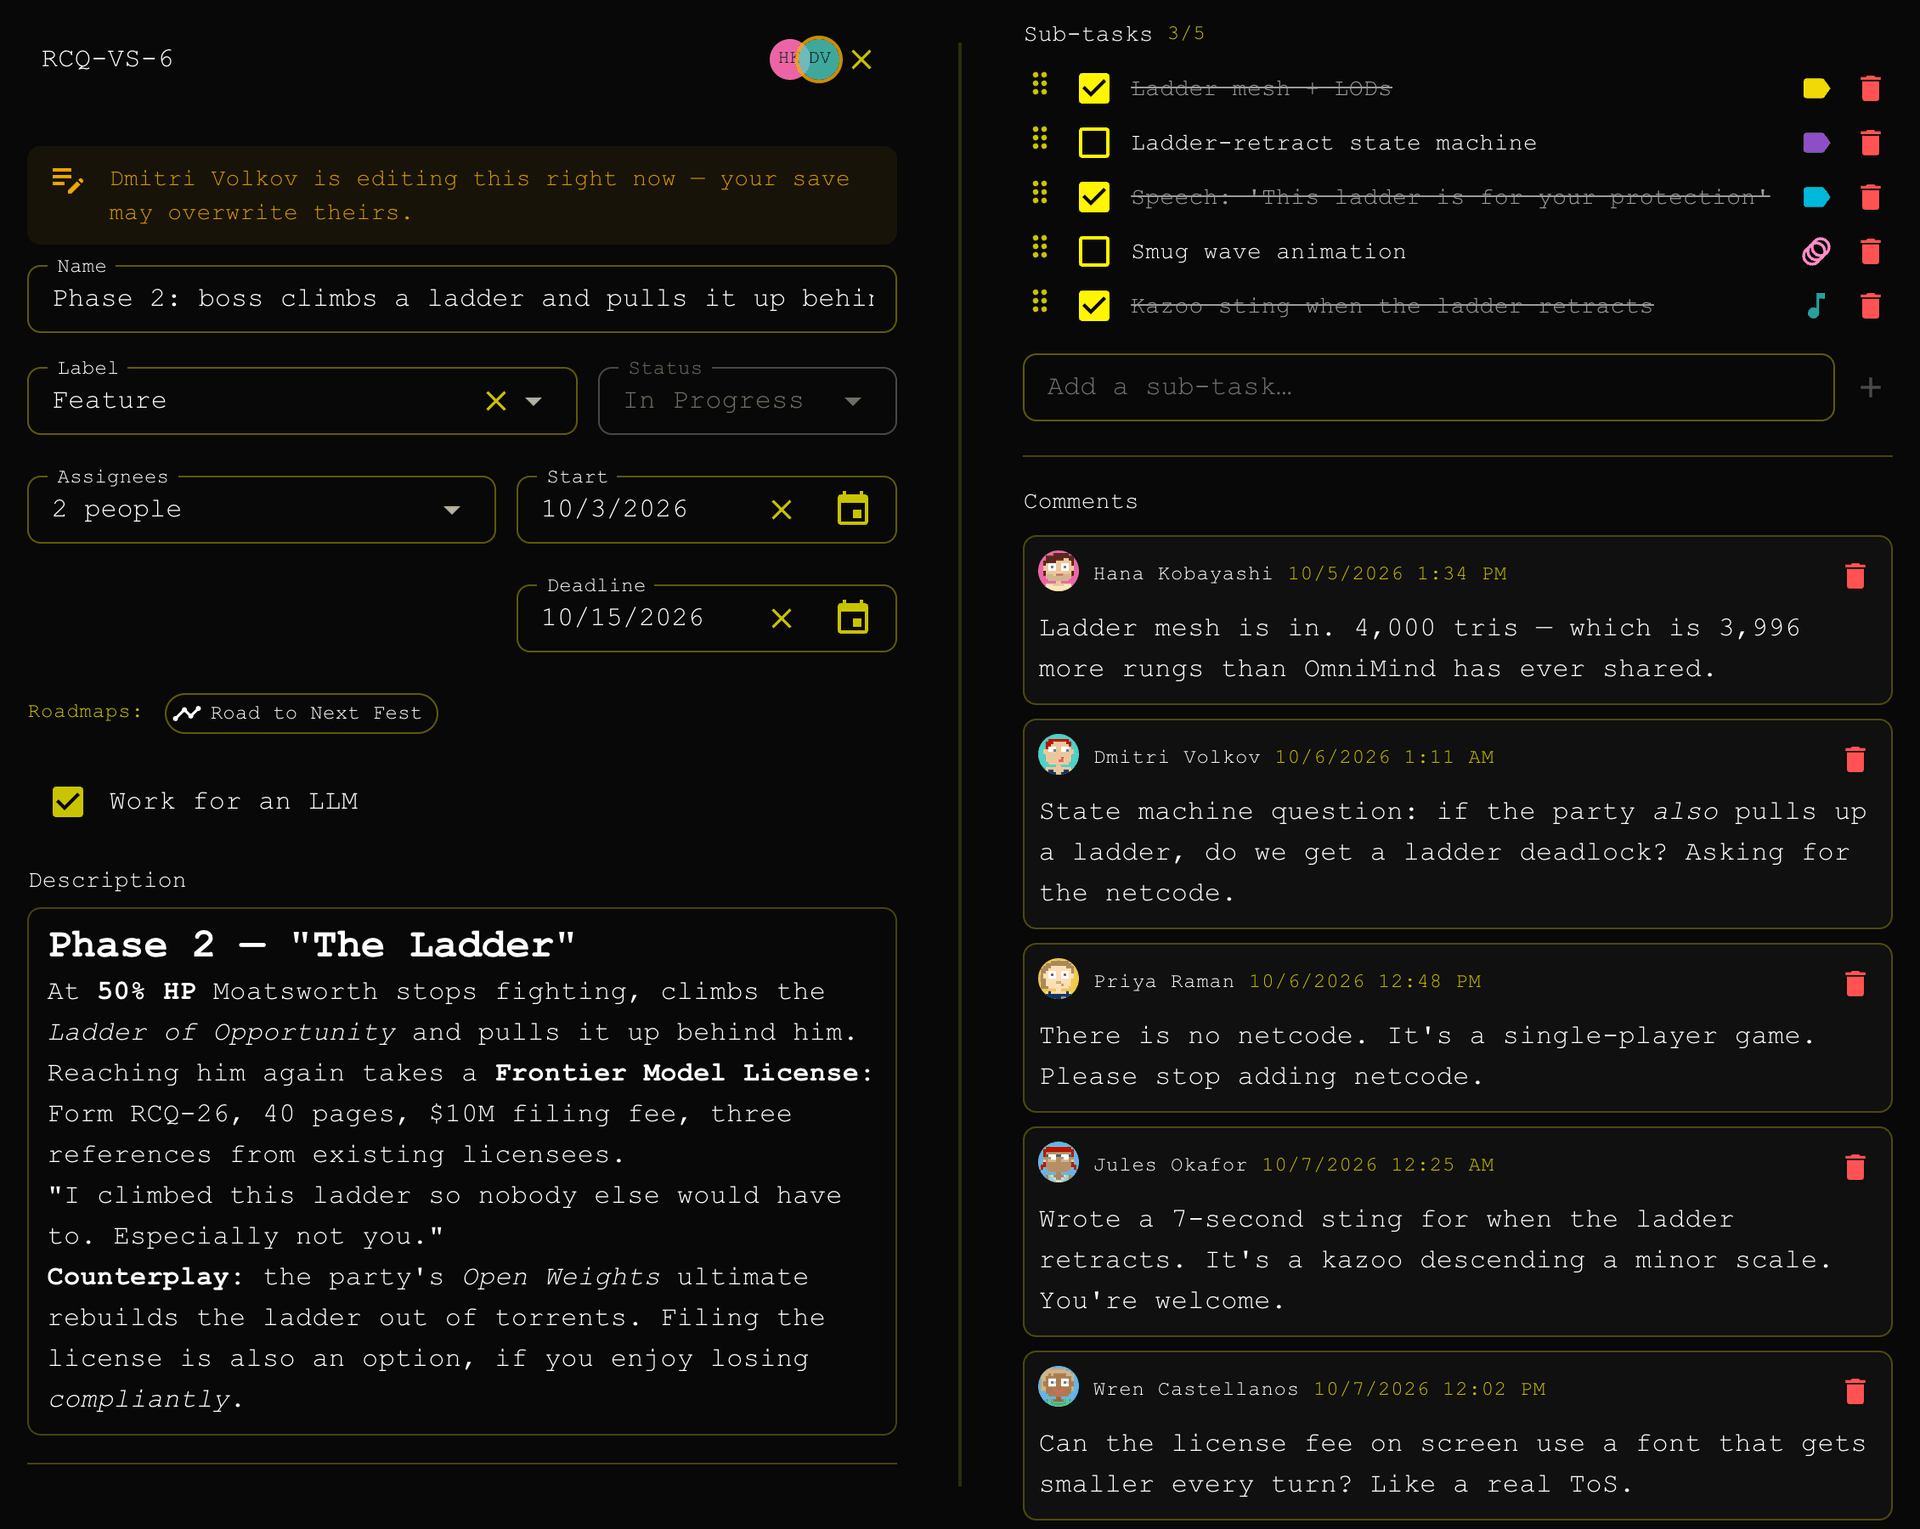
The top of the drawer shows the serial number of the task. Small pictures next to it show the other people who have the task open.
Solo saves each field when you complete it. You do not select a save button for the task.
| Field | How it saves | Notes |
|---|---|---|
| Name | When you leave the field or press Enter | 300 characters or less. |
| Label | When you select a value | One task label of the board. |
| Status | When you select a value | Unstarted, In Progress or Finished. |
| Assignees | When you select a value | One member or more. A pending member is not in the list. |
| Start, Deadline | When you select a date | See Dates. |
| Description | When you select Save | Markdown. 20,000 characters or less. |
A member with the Read only role sees all fields but cannot change them.
When two people edit one task
When a different person edits the task, the drawer shows a warning with the name of that person. A save by you can then replace the text of that person.
Solo also refuses a save when the task changed after you opened it. Solo then shows the current task. Enter your change again.
Dates
A task can have a Deadline and a Start date.
- Set the deadline first. Solo disables the Start field until the task has a deadline.
- The start date cannot be after the deadline.
- When you clear the deadline, Solo also clears the start date.
A task with no start date counts from the day you created it.
Deadline ring
A card with a deadline shows a ring.
- The arc of the ring is the time that remains between the start and the end of the deadline day.
- The colour changes from green to red as the time goes.
- The number in the ring is the number of days that remain.
- After the deadline, the ring is full and it blinks.
Solo hides the ring before the start date and for a finished task. Hold the pointer on the ring to see the dates.
Description
The description uses Markdown.
- Select the description.
- Enter the text on the Write tab. The Preview tab shows the result.
- Select Save. Select Cancel or press Esc to discard the change.
While you edit the description, the drawer stays open when you select a different part of the page.
Sub-tasks
Sub-tasks are the checklist of a task. Each card shows the number of completed sub-tasks.
| To | Do this |
|---|---|
| Add a sub-task | Enter a name in Add a sub-task and press Enter. |
| Complete a sub-task | Select its checkbox. |
| Rename a sub-task | Select its name. Press Enter to save or Esc to cancel. |
| Set a label | Select the label icon on the row. Select a sub-task label of the board. |
| Change the order | Drag the handle at the start of the row. |
| Delete a sub-task | Select the delete button on the row. |
Sub-tasks and status
When you complete the last sub-task, Solo moves the task to Finished.
Solo does not move the task back when you clear a checkbox.
Solo disables the Status field in the drawer while the task has sub-tasks. To set the status of such a task yourself, drag its card to a different column.
Comments
Each task and each epic has one list of comments, in the order of their dates.
- Each member of the project can write a comment. This includes members with the Read only role.
- To write a comment, enter the text below the list and select Comment. A comment uses Markdown and has 5,000 characters or less.
- To change your comment, select its text. You cannot change the comment of a different person.
- To delete your comment, select its delete button. An owner or a super admin can delete each comment.
On a closed board, nobody can add, change or delete a comment.
Markdown
Descriptions and comments use Markdown. Select Markdown below an editor to see this table in Solo.
| Type this | Result |
|---|---|
# Heading |
A heading. ## and ### make smaller headings. |
**bold** |
Bold text. |
*italic* |
Italic text. |
~~struck~~ |
Text with a line through it. |
`code` |
Inline code. |
| Three backticks on their own lines, before and after | A code block. |
- item |
A list with bullets. |
1. item |
A list with numbers. |
> quote |
A quotation. |
[title](https://example.com) |
A link. |
||RCQ-VS-6|| |
A link to a task. |
Solo shows HTML in a description or comment as text. A link can use http, https or mailto only.
Link to a task
Put the serial number of a task between two pairs of vertical bars:
Blocked by ||RCQ-VS-6||.
Solo shows a link that opens the task. The task can be on a different board or in a different project.
Move a task to a different board
You need the Read/write role. The other board must be open and in the same project.
- Open the task drawer.
- Select Move to board.
- Select the Board.
- Optional: select an Epic of that board.
- Select Move.
Solo opens the other board and shows the task. The move has these results:
- The task keeps its sub-tasks, comments, assignees and audit history.
- The task gets a new serial number, because serial numbers belong to a board.
- Solo updates the task links in the descriptions and comments of the project to the new serial number.
- The task and its sub-tasks keep a label only if the other board has the same label.
- The task goes to the end of its column.
A link to the old serial number from outside the project stops working.
Delete a task
- Open the task drawer.
- Select Delete task.
- Confirm.
To delete an epic, open the epic and select Delete epic. Solo keeps the tasks of the epic and moves them to the No epic lane.
The task menu
An extension can add commands for a task. When an installed extension does this, you can open the task menu in two ways:
- Right-click a card on a board.
- Select the More actions button at the top of the task drawer.